How to Calibrate a 3D Printer (The Order That Matters)
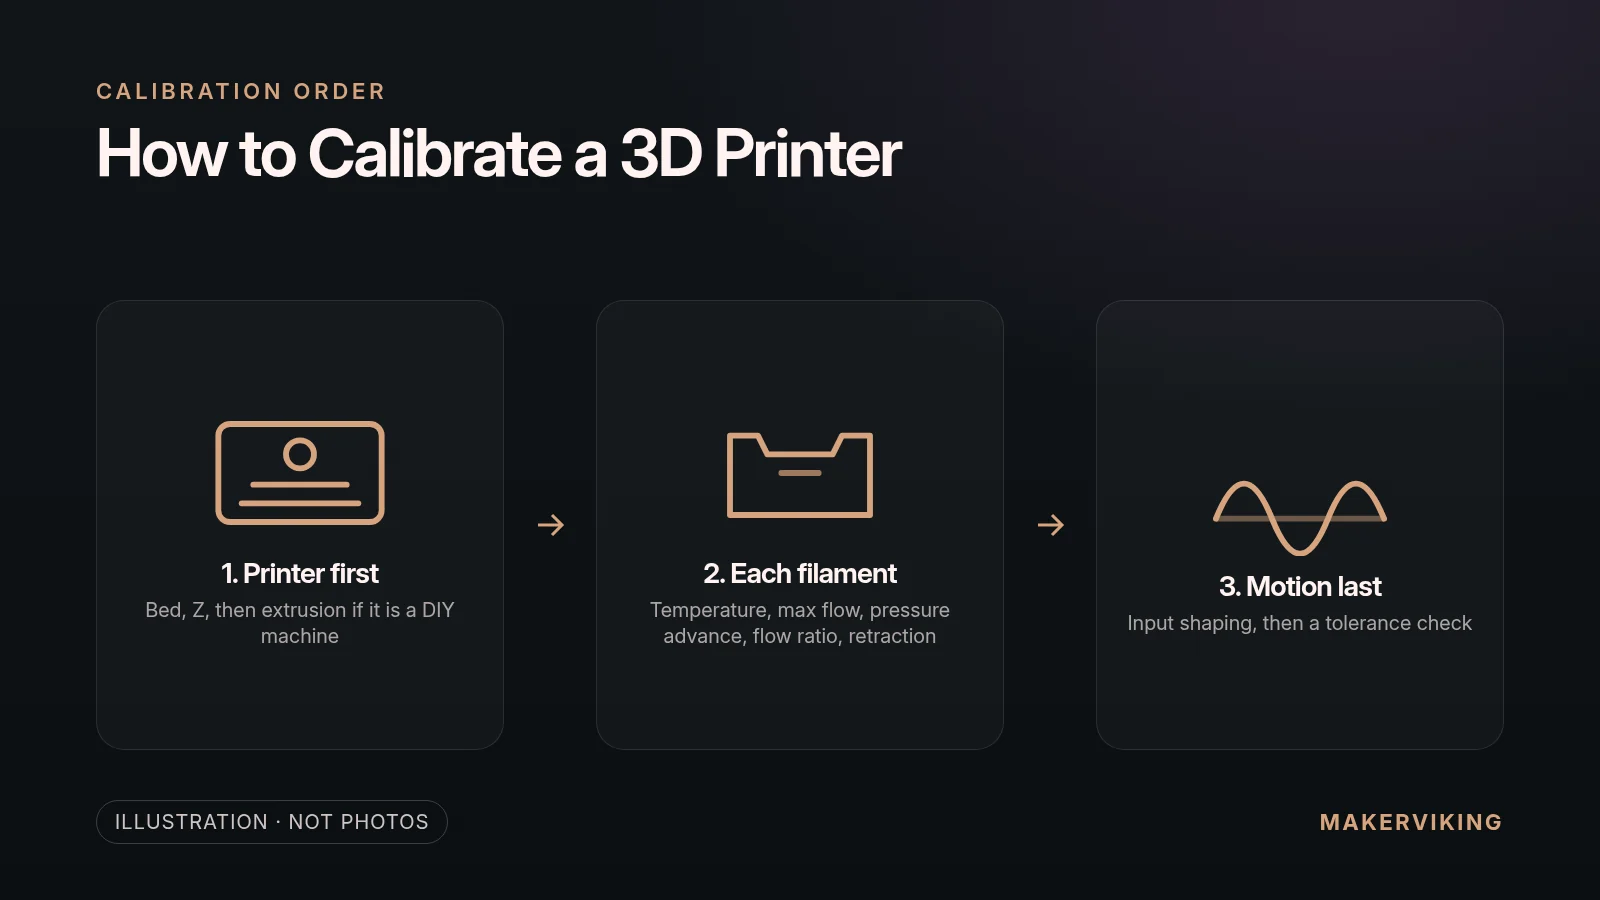
Short answer: To calibrate a 3D printer, tune the machine first (bed levelling and Z offset, plus extruder rotation distance or E-steps on a DIY build), then each filament in this order: temperature, max volumetric speed, pressure advance, flow ratio, retraction. Use the printer's own automatic tests when it has them, such as device calibration on the Snapmaker U1 or Flow Dynamics on a Bambu Lab printer. Input shaping comes after the filament basics, and a tolerance check comes last.
Updated 19 November 2026. The diagrams are illustrations, and every menu path comes from the maker's own documentation.
The first layer looks fine. The cube comes out clean. Then the lid you designed for it will not go on, and every sharp corner leaves a faint ripple in the wall after it.
That is not one bad setting. It is several small errors stacked on top of each other, and they only come apart in the right order. Tune them out of order and each test reads the error from the one you skipped.
This guide is that order: what you do once per machine, what you repeat for every filament, and where a Snapmaker U1 or a Bambu Lab P2S already does the work for you. It is a map, not a manual. Where OrcaSlicer, Klipper, Snapmaker or Bambu Lab has written the procedure, I link it and say where it belongs.
I use both paths. My Snapmaker U1 runs its calibration from the touchscreen, and my own Fenrir CoreXY build runs Klipper, where nothing is tuned until I tune it. Snapmaker sent me the U1 to test and has no say over what I write.
Start with the printer, not the filament
Two different jobs hide under the word calibration. One you do once. The other you do for every spool.
Machine calibration is about the hardware: a level bed, a correct Z offset, an extruder that feeds the length it is told to. You do it at setup and again when the hardware changes. Filament calibration is about how one spool behaves in that hardware, and OrcaSlicer's guide says to repeat it for each new filament.
| Job | How often | Where it lives |
|---|---|---|
| Bed levelling and Z offset | At setup, then after a move or a hardware change | The printer |
| Extruder rotation distance or E-steps | Once on a DIY build; already set on most boxed printers | Firmware |
| Temperature, max volumetric speed, pressure advance, flow ratio, retraction | Every new filament | The filament profile, or the printer's automatic test |
| Input shaping (vibration compensation) | After setup, a move or mechanical work | Firmware |
| Tolerance check | Last | Your slicer and your CAD |
The OrcaSlicer calibration guide opens with an assumption that is easy to read past: the extruder is already calibrated in firmware, as E-steps or rotation distance. It adds that most modern printers ship with this set correctly, and that small differences between filaments get corrected later in the flow ratio step. So on a boxed printer such as a U1 or a P2S you leave it alone.
A printer you built yourself is different. On Klipper the value is rotation_distance, the distance the filament travels for one full turn of the extruder motor, and the true number depends on how your drive gear grips the filament. The Klipper rotation distance page has the conversion from old steps-per-mm values and a measure-and-trim procedure: mark the filament, extrude 50 mm slowly, measure what moved, correct the number.
This page starts after the box is open. If you are still choosing, 3D printer specifications explained covers what the numbers mean, and my beginner printer picks and recommended 3D printers cover which one. My two examples are compared in Snapmaker U1 vs Bambu Lab P2S: the U1 for multi-colour work, the P2S for single-colour printing.
If the first layer is wrong, stop
Every test after this one prints on top of a first layer. Get that layer wrong and the results above it tell you about the bed, not the filament.
OrcaSlicer says it plainly about its quickest pressure advance test: the line method's accuracy depends heavily on the quality of your first layer. Bambu Lab's Flow Dynamics notes end on the same point: wash the build plate before you calibrate.
Three things have to be right first.
- A clean plate. Wash it before you blame a setting.
- A levelled bed. On a printer with a probe this is an automatic mesh, and it is worth running again after you move the machine or change a nozzle.
- Z offset. The gap between nozzle and plate on the first layer. Too high and the lines sit on the plate without sticking; too low and the nozzle ploughs through them. Bambu Lab's automatic calibration sets nozzle height along with bed levelling.
The first three entries in my 30 common 3D printing problems guide cover a first layer that will not stick, elephant's foot and lifting corners, and the warping guide goes deeper on bed cleaning and bed temperature. Come back when a single-layer square prints clean across the whole plate.
Do these five tests in this order
Run them out of sequence and each result quietly spoils the next. That is the whole reason there is an order, and OrcaSlicer's guide gives a reason for every step.
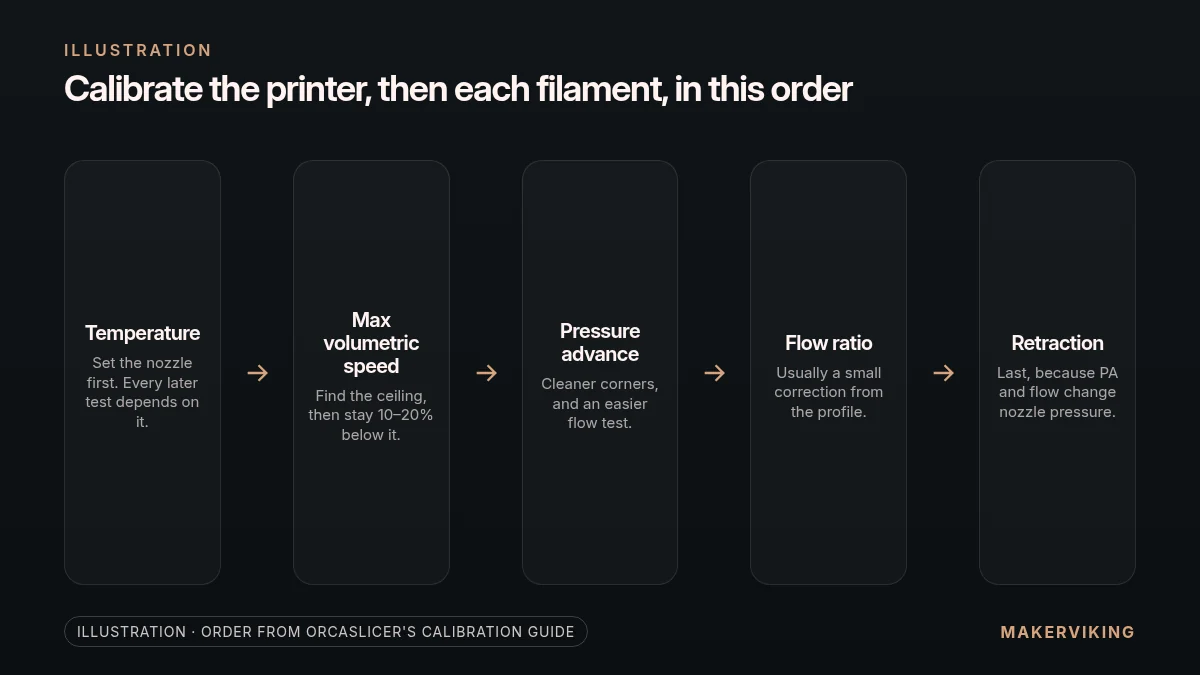
- Temperature. Nozzle temperature changes how thick the molten filament is, so every later test depends on it. OrcaSlicer flags it as most important for materials with a narrow temperature range.
- Max volumetric speed. This is the most plastic your hotend can melt per second with this filament. OrcaSlicer says to use a value 10–20% below the test result as a safety margin. Do not trust the number on the spool: the guide notes that some manufacturers overstate it.
- Pressure advance. It goes before flow ratio because it is the value most often wrong, or never calibrated at all, while the flow ratio in most filament profiles is already close. A tuned value also gives cleaner line ends and corners, which makes the flow test easier to read.
- Flow ratio. Usually a small correction, because the test starts from the profile's own value. OrcaSlicer recommends its single-pass YOLO method: print the blocks, pick the smoothest top surface, then add or subtract that block's modifier.
- Retraction. The defaults usually work. If you tune it, do it after pressure advance and flow ratio, because both change the pressure in the nozzle.
Two details from the same guide save a reprint. In the volumetric speed test, the point where the surface stops being glossy is your max external volumetric speed, the limit for outer walls and top surfaces. And pressure advance and flow ratio affect each other slightly, so if the flow ratio moved a lot, run a quick pressure advance test again.
For pressure advance, OrcaSlicer offers three tests: tower, pattern and line. The pressure advance wiki page says the tower takes longer but does not rely on first-layer quality, which is why I would start with it on a new machine. On Marlin, Linear Advance has to be enabled in firmware first.
The test prints give you a height or a block number, not a setting. My Orca Slicer Assistant has the three formulas that turn them into pressure advance, flow ratio and retraction values. One note: its flow formula is the multiply version from OrcaSlicer's older two-pass test, while the YOLO test simply adds or subtracts the modifier, as the flow ratio wiki page shows.
Step three has an automatic stand-in on some printers. The Snapmaker U1 calls it Dynamic Flow Calibration and Bambu Lab calls it Flow Dynamics, and both measure the pressure advance value for you.
When you are finished, OrcaSlicer wants you to create a new project to leave calibration mode. Layer height, walls, infill and speeds are a different job, covered in my slicer settings guide. If you have not picked a slicer yet, start with OrcaSlicer vs PrusaSlicer vs Cura.
When the printer can calibrate itself, let it
The calibrations after I assembled my U1 took a while. They are also not something you do often. That is the trade with a printer that calibrates itself: a long first setup, then very little to do by hand.
Snapmaker U1
Calibration on the Snapmaker U1 is four documented routines, each with its own trigger:
- Auto Leveling. Fully automatic, from a probe built into the printhead. Snapmaker's triggers: first use, a replaced toolhead, bed or nozzle, a firmware update, a move, or first layers that keep lifting.
- Vibration Compensation. The U1's input shaping. Snapmaker's official video guides put it under Settings > Maintenance > Device Calibration and say it takes about 5 minutes.
- Dynamic Flow Calibration. Automatic pressure advance, measured with what Snapmaker calls a high-precision sensor. You tick it in Print Preferences when you start a print, it takes about 15 minutes, and then the print starts.
- Multi-toolhead offset calibration. Lines up the four printheads, in about 15–20 minutes. Snapmaker's U1 FAQ lists four triggers: first setup, a replaced hotend, a nozzle that scrapes or hits the bed, and layer shifts during multi-toolhead prints. Colour regions that do not line up are the symptom its wiki names.
Snapmaker says the last three do not need repeating before every print. A filament change is one of the triggers, though. Its multi-colour printing guide lists an Extrusion Flow Calibration option on the print preprocessing page and says to tick it at first use, after toolhead work, when you change filament, or when extrusion looks wrong.
Bambu Lab printers
Bambu Lab's printer calibration guide describes automatic calibration that covers bed levelling, nozzle height, vibration compensation and motor noise. On a P2S it lives under Settings > Calibration on the screen.
Pressure advance has its own name here: Flow Dynamics Calibration, with the result stored as a K factor. The wiki's list of auto-calibrating printers names the H2D, X1 and A1 series, and says the P1 series is manual only. The P2S shares a section of that page with the H2D, which measures with an eddy current sensor in the toolhead, but it is not on that list, so check what your own screen offers.
Bambu lists the cases where the automatic result is unreliable:
- Damp filament, which gives a value that will not suit dry filament.
- A worn or partly blocked nozzle.
- Soft materials. The wiki says TPU has a high probability of calibration failure.
- A third-party hotend, on the printers that measure with an eddy current sensor.
- A 0.2 mm hotend, where Bambu recommends the manual method.
Those are the cases for a manual test. If you run OrcaSlicer's pressure advance or flow test on a Bambu Lab printer, the Orca wiki is specific: do not also select the Flow calibration option for that print.
And if you never calibrate at all? Bambu's wiki says the printer falls back to default compensation, and that the defaults give good results in most cases. Automatic first, manual when the automatic test cannot cope, and neither when the print is already fine.
Input shaping is a motion fix, not a filament tweak
Ghosting follows the printer, not the spool. A new filament profile will not tighten a belt.
Klipper's resonance compensation documentation describes input shaping as a way to reduce ringing, also called echoing, ghosting or rippling. It also says where ringing usually comes from: a frame that is not rigid enough, loose or springy belts, misaligned parts, heavy moving mass. Check and fix those first, it says, if you can.
That is why this step sits after the filament basics. OrcaSlicer files input shaping under optional tests that tune the printer, to be done once the filament is calibrated, because a badly tuned filament affects the result. It also says most recent printers have their own automatic input shaping, usually more accurate than its manual test.
So use the automatic one: Vibration Compensation on the U1, the calibration routine on a Bambu Lab printer. Bambu says to rerun it after moving the printer, because it maps the vibration pattern of the new surface.
The manual route on Klipper
On a Klipper machine like my Fenrir build, the documentation asks for a clean baseline before you print the ringing test:
- Set
square_corner_velocityback to 5.0 if you changed it. - Disable
minimum_cruise_ratio. - Disable pressure advance with
SET_PRESSURE_ADVANCE ADVANCE=0.
Then enable the shaper, restart Klipper, and check pressure advance again. Klipper's wording is that it may need to be re-tuned, not that it will. So yes, on a hand-tuned printer pressure advance gets a second look: once so the filament tests are readable, and once after the shaper is on.
With an accelerometer fitted, Klipper can measure the resonances and tune the shaper from that data.
How you know you are done, and when to do it again
Print something real.
A calibration cube, a Benchy and one part that has to fit another will tell you more than another tower. My list of the first things to 3D print on a new printer starts with the cube and the Benchy. Use it as a check once the procedure above is done, not as a substitute for it.
The fit comes last on purpose. OrcaSlicer puts its tolerance test at the end because the result depends on every calibration before it. If parts are still tight after all this, that is a design clearance question, and my guide on how to design parts for 3D printing covers it: I usually design with 0.2 mm clearance, and it depends on the printer.
In SindriCAD I keep that clearance as a named parameter, so a different printer is one number to change.
Then leave it alone until something changes. The triggers the manufacturers list are consistent:
- A new filament brand or type. Redo the five filament tests, or the printer's own flow test. Klipper's pressure advance documentation goes further: calibrate with each spool, because a different manufacturer or pigment can change the value.
- A new nozzle or hotend. Flow Dynamics on a Bambu Lab printer; levelling and toolhead offsets on the U1.
- A move, a firmware update or maintenance. Rerun the machine routines: levelling and vibration compensation. Bambu and Snapmaker both list these.
- A changed print temperature or max volumetric speed. Bambu lists both as reasons to redo Flow Dynamics.
- A drop in quality you cannot explain. Bambu's guide says a fresh calibration usually resolves sudden rough layer lines or messy corners.
Dry the filament before any of it. Bambu's warning is worth borrowing on any printer: a value measured on damp filament is a value for damp filament.
What you do not need is a ritual. The U1's toolhead offset calibration is a first-setup job, not a before-every-print one. If a print fails anyway, go to the symptom, not back to step one: the 30 common problems guide is sorted by what you see on the part.
Printer first, then the filament, then the motion, then the fit. Do it once properly, save the numbers in the filament profile, and go and print something.
FAQ
In what order should I calibrate a 3D printer?
The order is machine first, then filament. Level the bed and set the Z offset, confirm extruder rotation distance or E-steps on a DIY build, then run temperature, max volumetric speed, pressure advance, flow ratio and retraction for each filament. Input shaping follows, and a tolerance check comes last.
Do I need to calibrate every new filament?
Filament calibration is per filament, and OrcaSlicer's guide says to repeat its tests for each new one. A new brand or material type is the trigger, because flow ratio and pressure advance can differ between brands even for the same material. Klipper's documentation recommends tuning pressure advance with each spool.
Do I still need to calibrate a Bambu Lab or Snapmaker U1?
A Bambu Lab printer or a Snapmaker U1 is not calibration-free, but it runs most of the work itself. Both level the bed and measure vibration automatically, and the U1 and several Bambu Lab series can measure pressure advance automatically too. You still choose when to run the routines: at setup, after hardware changes or a move, and for a new filament.
What is pressure advance, or flow dynamics?
Pressure advance is a firmware feature that adjusts extrusion for the pressure lag in the nozzle as the toolhead speeds up and slows down. Klipper's documentation says it reduces ooze during non-extrude moves and blobbing during cornering. Flow Dynamics is Bambu Lab's name for the same kind of compensation, and Linear Advance is Marlin's.
What is input shaping, or vibration compensation?
Input shaping is a motion-control technique that reduces ringing, the ripples that follow sharp corners on a print. Klipper's documentation notes that ringing usually has mechanical causes, such as loose belts or a frame that is not rigid enough, and that those should be fixed first. Snapmaker and Bambu Lab both call their automatic routine vibration compensation.
Should I calibrate E-steps or rotation distance on a new boxed printer?
E-steps and rotation distance are firmware values that set how much filament the extruder feeds, and on a new boxed printer they are normally already correct. OrcaSlicer's calibration guide assumes this and corrects small filament differences in the flow ratio step. Calibrate them yourself on a DIY or rebuilt extruder, using the procedure in Klipper's rotation distance documentation.
Why do my corners blob after I raised the speed?
Blobs at corners are a sign of pressure left in the nozzle when the toolhead slows down, and Bambu Lab's Flow Dynamics page says the effect gets worse at higher print speeds. Run a pressure advance test again with the new speed settings. Bambu also lists a changed max volumetric speed or print temperature as a reason to recalibrate.
Sources
Sources were checked on 19 November 2026.
- OrcaSlicer: Calibration Guide
- OrcaSlicer wiki: Pressure advance calibration
- OrcaSlicer wiki: Flow ratio calibration
- Klipper documentation: Pressure advance
- Klipper documentation: Rotation distance
- Klipper documentation: Resonance compensation
- Snapmaker: U1 FAQ
- Snapmaker Wiki: U1 multi-colour printing guide
- Snapmaker forum: U1 official video guides
- Bambu Lab Wiki: Printer calibration guide
- Bambu Lab Wiki: Flow Dynamics Calibration